Monday, January 31, 2011

First Ever Blanket Party w/ HUGE giveaway ($172 value!) WOOT WOOT! :)

It's party time!  I'm so excited! :) A BIG thanks to Megs for all the help!  Don't forget each Monday you can see a special blanket tutorial!

 
Here is my blanket that I've made for Project Linus
Thanks to the gals over at Thread This Fabric for the fabric donation! I lined it with some green minkee. 

I love it.  So luscious!

And this was just a quick flannel blanket I whipped up last night. I figured - I needed one for a boy and one for a girl right? :)

I love the fabric!  They're nursery rhymes!  How cute huh!?
And I got a few great packages in the mail this month too!

This lovely blanket arrived from my friend Christina {2 Little Hooligans}.  Thanks Christina!! She even made a cute little bag!  I love it! 


This blanket was sent in from Kristen Mason!  It's one of the softest things I've ever touched.  Seriously!  Thank you Kristen!!

My Vinyl Designer has graciously donated one HUGE prize to one lucky person! 
With their designs, you can print cards, cut vinyl, embroider, make scrapbook pages, etch glass, and SO much more.  The designs also work on crafting machines like the Silohuette, Cricut, Craft Robo, etc.  We haven't found a software yet that cannot use one of our formats. The designs are like patterns that you can use over and over again.  It's all quite fun!
And...

They are giving their Starter Package Combo out -- that's a $172 value!! WOW!!!

WHAT'S IN THIS PACKAGE?  Two professionally packaged wall word vector collection CDs that house a whole lot of work and love for our typography and illustrative craft!  More specifically, this package includes: 


1- OUR VECTOR ART FOR THE HOME CD
This is a digital compilation of premade sayings, scriptures, quotes, growth charts, clock faces, etc., sprinkled with a few fun clip art images ... it's quite unlike any other wall words vector art package you've seen! It includes our first five 87-design master collections, complete with printable PDF catalogs, blank catalog pages for your own designs, and web-safe thumbnails for marketing ... basically a turn-key vinyl business package. We even added our embellishments collection as a bonus!

2-
OUR STICK FIGURE PLUS COLLECTION
This collection of stick figure vector art graphics is a digital compilation of completely interchangeable stick figure elements ... sprinkled with some tips and how-to's for making adorable stick families. It includes 120 bodies, 84 faces, 14 animals, 131 elements and non-stick family options, a pleasantly designed 5-page PDF catalog, and web-safe thumbnails for marketing. We even added a PDF customer order form for businesses.  It's truly the cleanest, most optimized stick figure vector design collection on the web!

Basically you get not only the tools to make cool projects like this

And this...

And this...

But they also give you everything you need to start your own business.  They are some really great ladies who have great projects and really want to help other women out there!  There are lots of business resources on their site!

Want to win?!?!?!? Of course you do!

All you have to do is link up a blanket you've made over at Today's Top 20! Then, visit My Vinyl Designer and leave a comment about what you would make if you won. 

Have you or do you have signed up to be a blanket guest poster?  Then add a second comment telling me either have posted or you are scheduled to post. {Want to schedule a post?  Email me - amandaandandy(at)yahoo(dot)com  I'll get you scheduled and you can add a second entry!}

Or if you are either Christina or Kristen {or your blanket is currently in the mail...} add a third comment!  Easy stuff!  One lucky gal will win via random.org.

The winner will be announced on Friday! Good luck!!  I can't wait to see all of your blankets!

And tomorrow is our Blogger of the Month party over at Today's Top 20!  Pick out your fave project you've made in Jan and come link it up for a chance to win HUGE prizes!! :)

Sunday, January 30, 2011

BIG DAY TOMORROW!!!

Tomorrow is the blanket party!  WOOT WOOT!!! My Vinyl Designer is giving away a HUGE prize to one of the links!!! Make sure you link up!


AND ...

Tuesday is the Blogger of the Month Link up at Todays Top 20!  Pick any project you've done in January and link it up here for the chance to win - 1 free month ad space, a blog spot light post AND a great prize from My Vinyl Designer!!  We'll (meaning me, and 2 fabulous guest judges) will pick out our favorites and then you will vote on the winner! 

I.can't.wait!

Tuesday, January 25, 2011

Want a funny story...

So last night.  I decided I wanted a change.  So whats the easiest thing to change?  My hair.  I've dyed my hair since I was 14.  It's been about every color. So while I was at the drug store yesterday I picked up a box of blonde.  Now my hair is dark.  Really dark brown.  REALLY dark.  So the blonde should take it to a light brown.  Nothing major.  But enough ya know?

So I put Josh to bed.  Andy left for work and it was just me.  I started dying my hair.  I used Nice and Easy.  I've never used it before.  Oh my gosh.  First off all.  The SMELL.  Not that hair dye smells good or anything.  But this.  The fumes were horrible.  At one point I just turned my head trying to get some air - and the fumes were burning my eyes.  I had the bathroom door open and I had to go out in the hallway just to breath.  But what could I do?  I had my roots done. 

So I finished.  Showered.  And oh my gosh.  My hair was not dark anymore.  Nor blonde.  NOR light brown.  But more like an orange color.  Are you kidding me?  I've never had this problem! 

What to do?  Josh was asleep.  Andy gone at work.  {Here's the kicker....wait for it....wait for it....}

So I go to bed.  Ug. Wake up.  It's field trip day!  I'm a parent volunteer!  Woo-Hoo!  No time to try to fix my hair.  Andy walks in at 7:45 and just looks at me.  You know that look? Should I laugh?  Should I say something?  Should I pretend I don't notice?  No wait this is to funny not to say something.  Even if she kills me.  Yes.  I have to say something.  And laugh at her.  And brace myself. Yea that look. 

"Nice hair honey."

And well, this is a family friendly blog (because I'm sure kids are reading this...) but I won't tell you my response.  Great field trip.  Glad to look like an idiot.  I'm off to fix my hair.

By the way... Nice and Easy has a review of 2 stars.  And only 32% of people said they would recommend them to someone.  Guess what?  I'm NOT part of that 32%.

Monday, January 24, 2011

Guest Post: Tea Rose Home and her Swaddle Blanket

I just love Tea Rose Home.  Sachiko is seriously talented!  And I was so excited she agreed to post today! :) You have to check out her blog.  Everything she makes turns out amazing!!

Hi everyone! I am Sachiko from Tea Rose Home. On my blog I share sewing, quilting, repurposing ideas (and don't miss the free tutorials!) and sometimes yummy recipes too. I host link parties every Wednesday. If you love to see what people are working on and want to be inspired, come visit me and join the fun!

Amanda asked me to be a guest blogger for her blog, and I am totally honored to be here. Thank you for inviting me Amanda!

Today, I am sharing a tutorial for a self binding method to make swaddle blankets. I hope you will enjoy it!

I have made so many blankets in the past. I think this is one of the most easiest ways to make baby blankets. It might be a little confusing at first, folding the corner, but once you get used to it, you can finish a blanket in no time!


{You will need}

1- 43" X 43" flannel (It was 44" wide flannel, I cut off the sides to get rid of the writings and thickness. This fabric will be the outer border.)

1- 36" X 36" flannel

Matching thread

{How to}

1. Mark the middle for all sides for both fabrics. Lay them together with right sides together. First, pin the middle of the four sides. Then pin the edges starting in the middle make your way outwards to the corners.


2. Start sewing using 1/4" seam allowance. Remember to leave a 5" opening for you to turn the fabric inside out later.


3. Fold the corner. Draw a line to help you to know where to sew. Use the picture as a guide.


4. Cut the excess off. Repeat the process for the other corners.


5. Press the seam towards the outside with an iron.


6. Turn the fabric inside out. Iron. Pin the opening and top stitch all around the blanket.


7. Ta-da. That's it!


Wasn't that fun? I have been going through my stash and made some in the past few weeks. They always come in handy for baby showers and such. I hope you enjoyed the tutorial!

Tuesday, January 18, 2011

More Quick Easy and Cheap Valentine's Decorations

Alright here are just a few more things I've got around the house.
I got these candle holders for free from a girl I knew.  So I threw on some mod podge and rolled them in glitter.  Threw some left over red hots in the bowl and there they sit.  The candle holders are holding some Glade candles.
Cost: free

Please ignore the fact that I need another box of candy thrown in there!  Vase - Goodwill $1.  Flowers $3 (that I bought last week and are still looking good!!) Candy: $4 (it will take 4 boxes...not 3 I guessed) at Dollar Tree.  Jar in the middle - Free recycled

I can't decide if I'm going to keep the red....or put candy hears in next time.  Because next to the flowers I have this candle
Junky picture.  Sorry but it looks totally cool.  I just hot glued candy hearts all the way around a pillar candle.  And I love it!!!

So what decorations do you have up in your house?

Monday, January 17, 2011

Decor chick link up - My house

So I am missing my USB cable.  BUT these pictures were already loaded on my camera.

Decor Chick is linking up

This was one of those things I knew I had to join.  Because well.  I'm embarassed.  But curious.  Does anyone else's table look like this??
For real.  It doesn't always look like this.  Just lately.  Do you see that fabric?  I have a fabric problem.
Because check out my crafting closet.  {Warning: it's an organized mess...}

FABRIC everywhere.  And not to mention all over the table.  And in another shopping bag (yes, I bought more yesterday), on the washing machine, in the washing machine. 

What new fabric came in the mail the other day you ask?

This lovely stack.


These 3 are from Sew mama Sew!  I'll have to take pictures and upload the other 3...and the other 6 yards that came in the mail this weekend. 

{Hides my head in shame}.  My fabric addiction is making me look like I belong on that show Hoarders.  Well, at least my kitchen table look like that.

But I have been re-organizing.  Look at my cabinets.


 Yes, there are like 10 bags of chocolate chips in there.  But Kroger had them way on sale -- think $1.50/bag and I had a bunch of $1.00 coupons.  What can I say.  I guess I need to make cookies.  To give away.
Make cookies with some of these cookie cutters.  Most of which have not been used. 


Take that Hoarders. See.  My house isn't a mess.  Just parts of it. :)

But this post has inspired me.  I'm cleaning out my stash.  I've got a problem.  I buy fabric.  Love it.  And then don't cut it because I want it to be the perfect fabric.  So I'm going through.  Either it has a project or I'm listing it for sale.  Pretty cheap for sale.  So I'll let you know when.  {Obviously fabric that was donated for Gabe's Gifts will not be for sale - Plus it's got a project already picked out!}

And since I just need 1 more person (come on lurkers) to make 100 I'll do a give away of something.  Hmm...what to give....

**UPDATE** Fabric.com just dropped off a package to me.  A small one but still a package non the less. 1 layered cake and 1 yard of Cat in The Hat fabric. 
Neither of which has a specific project in mind.

Blanket Tutorial: Kojo Designs!

I love Kojo Designs blog!  They are two amazingly creative ladies!  And they have a pretty incredible Etsy shop too!
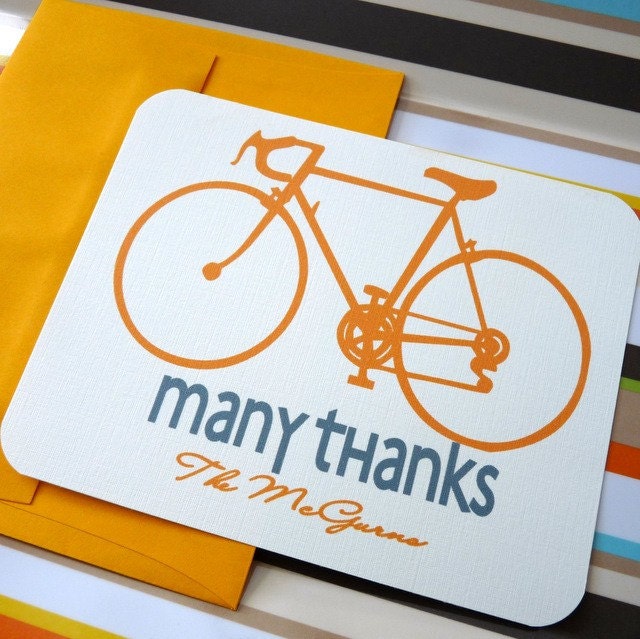
personalized stationery- custom bicycle thank you notes
I know the perfect guy who would love this!

And they have Kojo Baby with the cutest little outfits.

But Kristin and Jordan really don't need an introduction - they're sewing superstars!  And I'm so excited that they agreed to share their famous Anthro Blanket tutorial!!  Thank you girls! 

Before we get started piecing a PILE of knotted squares together, do you want the backstory on this little Anthro-inspired gem?

First, you should know that I'm a bedding junkie. I LOVE wandering through Pottery Barn, Restoration Hardware, Crate and Barrel, Anthropologie (at Park Meadows  in Denver, those stores are all conveniently located near each other as well) to see their bedroom displays. My ever-changing bedding crushes are a constant around here.

So a few years ago, I found this Thai Silk Bedding at Restoration Hardware and fell in love. I have a bad habit of loving expensive things, and this was no exception. We were still in the dual-income-no-kids category at that time and so Adam surprised me with the dream-bedding. *Note, I tried to find a picture for you, but turns out five year old bedding isn't very popular in google images. ;)

Fast forward to this fall when my oh-so-beautiful Thai Silk Bedding RIPPED. Yep, you read right... it was destroyed, not functional and, worse, not fixable! Since the era of able-to-splurge-on-bedding-we-love is long gone, just replacing the duvet cover is not exactly an option anymore.
But then, of course, I went and fell in love with the rosette bedding at Anthropologie. It shares all sorts of things with my Thai Silk Bedding... it's beautiful, and lovely, and totally out of our price range. Isn't that how things go?

When I saw the rosette bedding at Anthro, I had this idea in the back of my mind that perhaps I could try to make my own vision of knots and loveliness... but shelved it to pursue more immediately important matters (like tending to a new born baby, and creating things for sytyc, and getting ready for the parties I was throwing, and trying to stay somewhat on top of normal life). And then we made it to the Wild Card finale for So You Think You're Crafty. What better chance to try out my crazy bedding-making idea?

And thus the Anthro-Inspired Knotted Bedding was born. Thank you, So You Think You're Crafty, for giving me a chance to attempt something I might not have otherwise. My husband thanks you too. Because instead of spending $400+ on the quilt at Anthropologie (or, more likely, settling for something we didn't love nearly as much), I made this little getup for around $30. Glory, sheer glory.

Ok, now onto the tutorial. :)

To put your 'quilt' together, you'll need:
-56 knotted squares from part 1 (for a king sized quilt)
-a king sized duvet (I got the thinnest one I could find at Ikea... it was $29... fabulous!)
-sewing machine and supplies
-TONS of pins
1. Start by piecing one row of squares together at a time. Your finished product will have eight rows of seven squares. Here's the thing- in order to achieve that wonderful, gathered look, you have to create the gathers as you go. I did this by pinning little pleats in place before sewing squares together. To be more specific, I pinned five pleats along the length of each square (one tip- if you pleat both squares and pin, this will go more quickly). So, pleat, pin (right sides together) and sew.
2. Repeat and repeat and repeat until you have eight rows of seven knotted squares.
3. Now, you're going to sew the rows together to make a big square-ish mass of knotted squares. It was easiest for me to pin first where the edges between squares met up and then pin more pleats in place. Remember, every time you sew two squares together, you have to 'create' little gathers. As you're sewing the rows together, this means that you have a lot of pinning to do before you sew. Also, be sure to pin the sides right sides together. When you're finished you'll have the top part of your 'quilt.'

4. Lay out your duvet. Place your quilt with the right side (the side with all of the knots) facing down on top of the duvet. Be sure to match so that the longer side of the duvet is lined up with the row of eight squares and the shorter side of the duvet is lined up with seven squares.

Pin all the way around the edges, again, pinning pleats in place. Lucky for me, my duvet was divided into seven sections that matched up with my squares, so that was a good guideline on the short edge to make sure I was pinning evenly. On the long edges, I folded my duvet in half and marked where the middle would fall then folded it in half again and marked the quarters (on both long edges). This became my guide for even pinning on those edges.

Sew around the entire perimeter, leaving one square open. Pull the duvet through the one open square, turning the whole thing right side in. Sew your one square opening shut.

*Note- I can't say this enough, go over the ENTIRE quilt and make sure you got all of your pins out. Once you sew this baby shut, you don't want little pins pricking you. And they like to hide in the pleats, so check thoroughly!
5. Fluff your almost quilt. It almost looks right, doesn't it? Almost done! Now you're going to pin your rows in place and 'stitch in the ditch' (I followed this tutorial on youtube- haha!) so that your squares stay put and don't shift all over the place. I sewed down every other row, but feel free to do as many as you please.
 6. Can you believe it? You're done! Put this vision of loveliness on your bed and admire!

I am working on shams... I'll put a tutorial together when I get those done! Also, if you're looking for part 1, it's here.